Wednesday, June 22, 2011

And the Winner of the Embroidery Challenge is....

Sara!


After a running a close race all week, Sara pulled ahead in the final hours to take the tiara.

You can read more about Sara's project, Audrey's Magic Pillow, here.
You can read more about Sarah's project, Retro Table Runner, here.

We also have another winner this week.  "Jil" is the winner of the Stitcher's Revolution pattern and Aunt Martha's tea towels.  Once again, thank you so much to http://www.colonialpatterns.com/ for sponsoring this great giveaway.  Be sure to check out all their great stuff!

Check back tomorrow to find out what Sara and Sarah will be up to next.
svs signature Pin It

Tuesday, June 21, 2011

What's in Your Sewing Box?

I was bouncing around the blogosphere Monday and ran across a post on Prudent Baby called Start Sewing: What You Need in Your Beginner Sewing Kit. It got me thinking about what I think is important to have in my basic sewing box. The truth is, it hasn’t changed much over the years. There are a million gadgets out there, but as long as you have these essentials, you are ready for just about anything.

-Thread – black, white, grey and cream will do just about everything you need
-Needles – I keep straw needles and embroidery needles as that’s what I like for hand sewing
-Thimble
-Good, sharp thread scissors with a pointed tip that cuts all the way to the end of the blade
-Good, sharp fabric shears (these will never be used on paper)
-Good, sharp paper scissors

-Rotary cutter with extra blades
-Fabric marker (non-permanent) – I love the Sewline pencil
-Pens, pencils, a Sharpie, and an eraser
-Notepad
-Scotch tape
-Glue stick
-Measuring tape (Sara recommends a retractable tape measure)
-1x6 clear acrylic ruler
-Good quality seam ripper – you want the blade to be flat and sharp

-Tweezers
-Magnetic pin cushion
-Pins – I like a longer pin with a glass head
-Binder clips for things that can't be pinned, or mini clothes pins
-Knitting needle for turning corners
-Bandaids
-Lotion – that fabric will dry your hands out
-Reading glasses – I only had to add this one in the last year!

Of all these things, it’s the three pairs of scissors that I consider the most important. This is where I would advise spending some money. I love my Fiskars shears and wouldn’t trade them for the world. We’ll have to have a seriously talk if I ever catch you cutting paper with them.

I use a tackle box to carry all this around in. You can read about that here.  Sara has a more traditional sewing basket seen here:

Here's a peek inside at some of what she has accumulated:


So what’s in your sewing box?

Pin It

Monday, June 20, 2011

Twirl Skirts & The Crafterhours Skirt Competition (and my serger)

Longest blog post title, ever? I guess I'm trying to cover a lot here! :)


So, I did it ... I bought a serger. I ordered 'her' online ... I counted the days until she arrived. She thrilled me by arriving a day early ... and we are in love. Love I tell you! As soon as my kids went down for a nap, I plugged her in and watched the DVD that came with. Oh, I got a Brother 1034d serger - it appears that most of my favorite bloggers also use this particular model. I did serious research! :)

As soon as I thought I could turn it on and serge without breaking it, I whipped up a skirt. Then another, and then another. I told you, I love her.


These adorable Twirl Skirts were made with the Lil Blue Boo pattern. I made a 24m/2t for my youngest, a 3t/4t for my oldest, and a large for myself. I've never worn a large anything in my life, but this is clearly the size I need :) Our skirts fit perfectly. This pattern is easy to follow and this skirt is ridiculously easy to sew. Like so ridiculous I made all three in less than 2 hours.

I entered my skirt into the Crafterhours 2011 Skirt Week Competition. Clearly, I like a little competition as Sara vs. Sarah is all about the bi-weekly competition! Have you voted for the Embroidery Challenge? Do so here! Back to Crafterhours ... This is another blog I am so happy to have found; I feel like I must've been living under a rock to have missed it before, but it's full of funny writing, pretty pictures & clearly written tutorials. 


bracelets close up

Do you notice the cute bracelets we are all wearing (I went a little overboard on the matchy-matching'ness)? So fun! I made them using this tutorial for a jersey knit bracelet from V and Co (I love this blog - pretty stuff all the time). The bracelets are made from the same fabric as the skirt - the red peeks out in some parts and hides in others. For the girls, I made the 2-strand bracelet and only had to use one strip of fabric; for mine, I made a 3-strand from two long strips attached together (as explained in the tutorial I used).

The girls LOVE their skirts and love to spin in them! (ok, so we all like to spin!)

Fabric I Used:
Red / White stripe 100% cotton from eBay
Black Ribbed Knit for the waistbands

Now, I am definitely in love with my serger, but we have some tension issues to work out. You see, she does perfect work (I learned this is called a 'balanced stitch') when sewing through multiple layers - 3 layers? Gathered ruffles? No problem. BUT, I am having issues with serging a single layer. I need to tweak all the fancy tension knobs and get this working.


I've labeled my serger (she needs a name) in a couple of places to help me. Yes, the labels are color coded. Yes, I am a nerd.

I HAD to write this one down ... increase tension  = lower number; decrease tension = higher number. Sounds backwards, right? I think so too ...

sara sig Pin It

Thursday, June 16, 2011

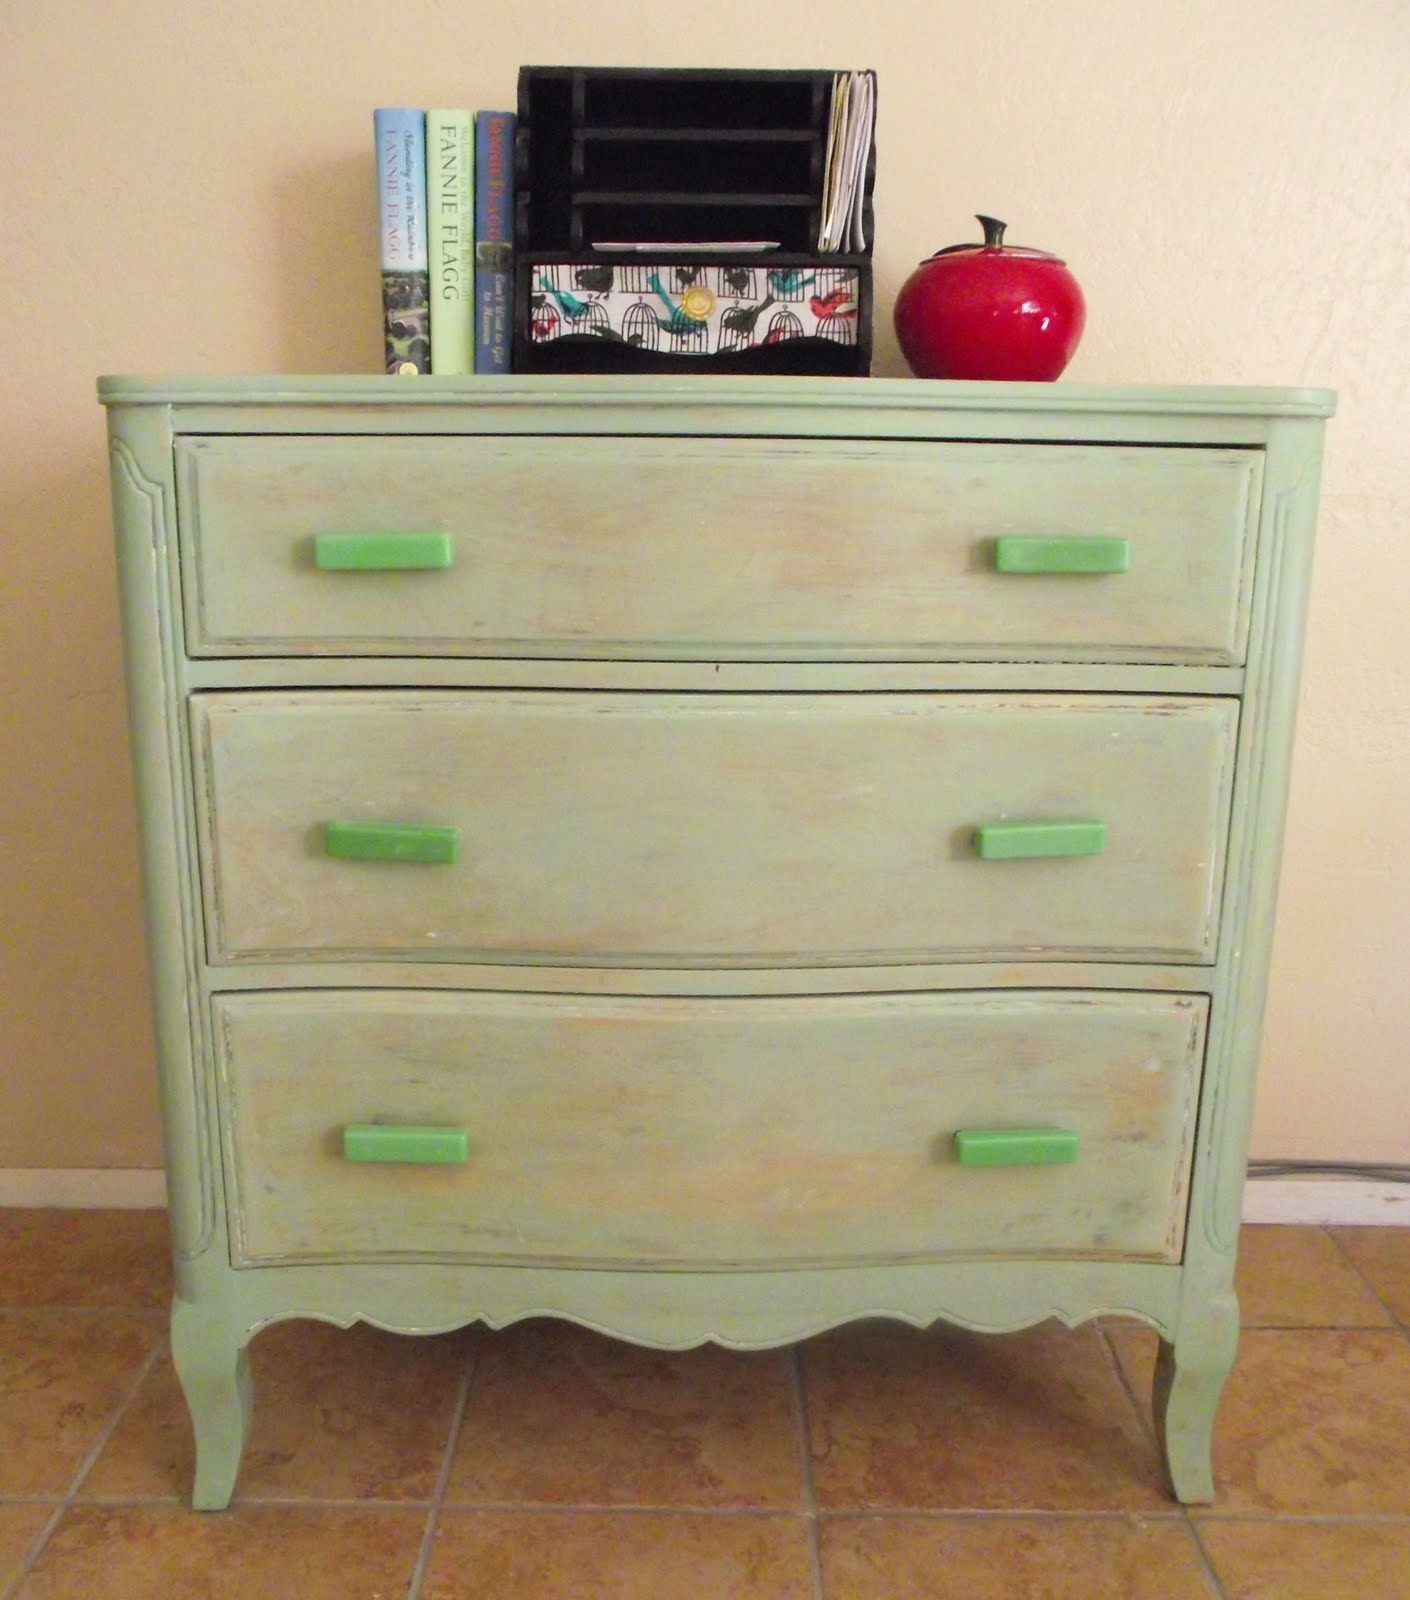
Another Furniture Makeover

The Cake Stand isn’t the only piece of furniture I’ve refinished this year. I finished this gem of a dresser back in March.
My beautiful green dresser with faux Jadeite drawer pulls.
When I found it, it looked liked this:
One of the worst paint jobs in furniture history.
Poor old dresser. That paint job is crime! I guess that’s why I was able to pick it up for a mere $24.

When I saw it at the thrift store, I knew immediately that it was a great piece of furniture. It still has its label from the Davis Cabinet Company of Tennessee. There’s also a stamp indicating that it is 100% beech.

I was able to thoroughly strip away that felony paint job so I decided to stain it instead of repainting it. Just for fun, I went for a colored stain with a waxed finish. I love the waxed finish! That was a “new-to-me” technique and I’m sold on it.
A view of my faux Jadeite drawer pulls made from resin.
The final conundrum was the drawer pulls. The dresser had no pulls whatsoever when I bought it and I was finding nothing I liked at local hardware stores. What else is a crafty girl to do, but make her own?! I bought a drawer pull mold and hardware, and cast my own using resin colored to look like Jadeite. I think they look great. Yet another thing you can do with resin!
Closeup of the "Jadeite" pull.
Pin It

LinkWithin

Related Posts Plugin for WordPress, Blogger...