Showing posts with label scrapbuster. Show all posts

Thursday, December 8, 2011

Sweet A Line Dresses - Scrappy Style


So it's pretty obvious I *may* be a little obsessed with Lil Blue Boo, right? Yes, yes I am! When she released a new pattern last week I of course bought it right away, and made 4. Yes 4. Here are numbers 3 and 4 ... still need to photog numbers 1 and 2 :)


I so love LBB stuff that I bought a box of scrap fabric a while back; who can pass up promises of those silk screened scraps? Well not me. I have been just waiting and waiting for a good idea to pop into my head for using my favorite silk screen scraps (the "when I grow up" print, and the paper dolls)! This is what I came up with and I couldn't be happier!


This pattern (like all the others) is great. Easy, easy to follow, and super cute. I've made sizes 2/3 and 3/4.

It's safe to say we "all" like the new dresses. Except the little ones said they were "freezing" on this particular day (it was like 65 degrees here = freezing) and so we had to zip back home for long leggings and coats ... oh and the photo session was abruptly ended when my models walked out on me! ....


Isn't it cute how the little one's dress back is a completely different - yet totally coordinating - fabric? I love that!

Oh and did I mention this pattern goes up to size 14 years?!? So, nieces heads up: you're getting dresses for Christmas this year! ;)

sara sig
Pin It

Monday, August 15, 2011

Making Hairbows from Knit Scraps - {DIY}


You know how you end up with tiny little scraps like this:

All of these scraps were turned into the rosette clips pictured above!

I am using these lately to make hairbows / hairclips for my girls. Since I've been making a lot of clothes, I have all those scraps, so I can coordinate the bows perfectly!

For the pink rectangular scrap up there, I cut it down the middle (long ways) to about 1" before the end - waalah! One long strip! Since you twist and wrap anyway, that square end is not noticeable.


I stocked up a while back on various kinds of hairclips. I like the "alligator" style one for one daughter (very thin hair). I love these little organizer boxes that I found at the craft store; they are perfect for little things!

These are SO easy to make. There are about 40 million tutorials on the web for rolled rosettes, and Sarah has instructions here. Basically, you tie a knot in one end, and then twist and wind - hot gluing as you go!


When you get to the end, you'll have some left over ... I like to glue that down over the BOTTOM of the rosette. You can trim is "round" so that you don' t see any of it from the top!


To attach to a clip, I like to add a strip of felt BETWEEN the prongs and then apply glue all over the top of that strip:

...and them plop the rosette on top! Then, I trim that strip so that it doesn't show. For small flowers, I start with a smaller strip:


If you make them, have fun and make plenty!

sara sig Pin It

Thursday, March 31, 2011

Scrapbuster Round-Up


Here we go, our last scrapbuster post and are we relieved!!  It was a ton of fun, but a lot of work so we decided to give ourselves a break and finish up with a summary.  You can click through to all the projects in the collage.  Thanks for sticking with us through Scrapbuster Month.  We appreciate all the comments and your support!

FYI, Blogger seems to be having some issues with it's polling widget.  We know we lost some votes since yesterday.  We have been keeping an eye on this and we have let Blogger know there is a problem.  Sorry about this!  If voted yesterday, you should be able to vote again.

Check in with us tomorrow when we let you know what you can expect in April!
svs signature Pin It

Tuesday, March 29, 2011

Scrapbuster No. 31: Fabric Covered Magnets

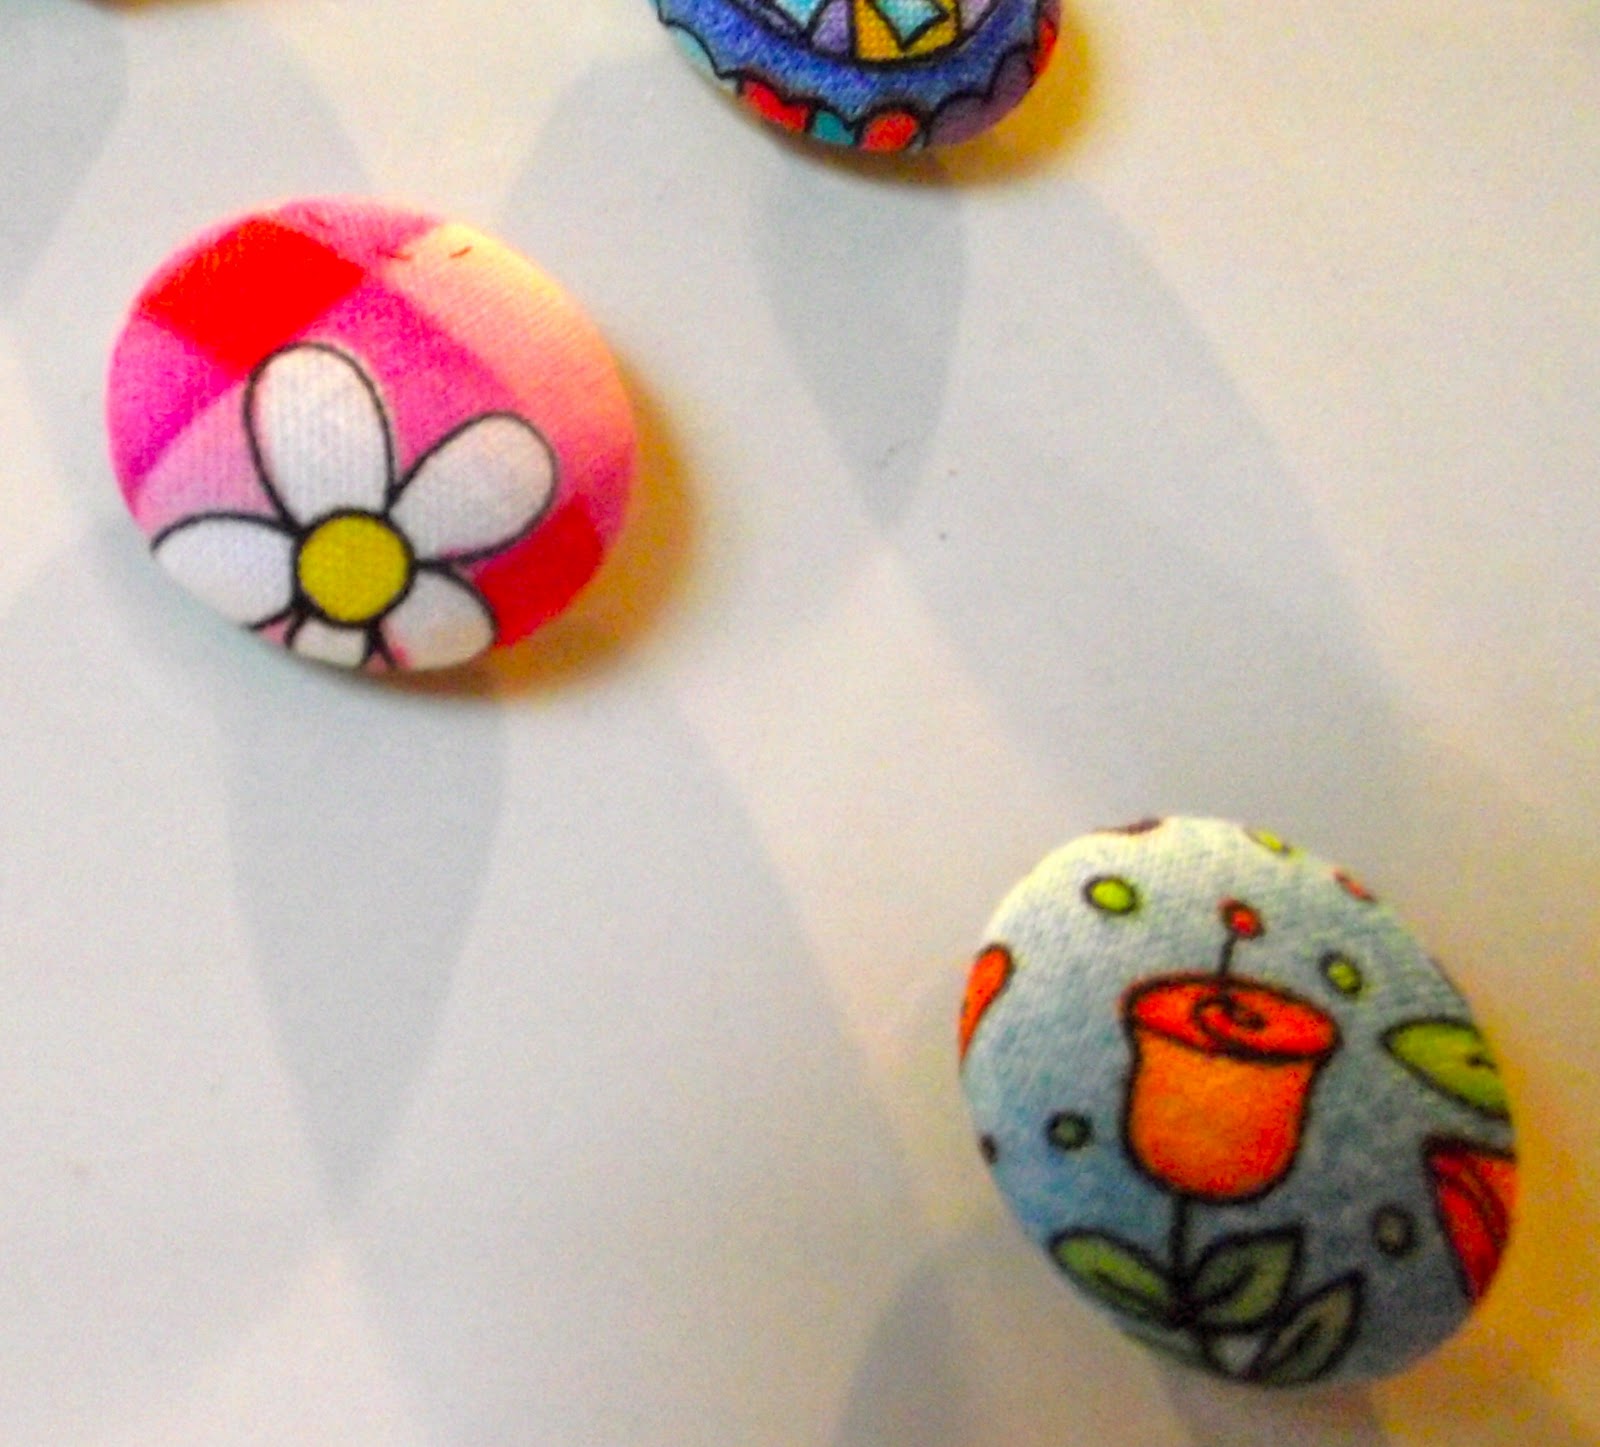
Fabric covered magnets.
Some time ago, I saw these adorable fabric covered thumbtacks on How About Orange.  I wanted to make them, but I have no need for thumbtacks at my house.  It took me until yesterday morning to figure out that I should make magnets instead.  Duh!!  Once upon a time, my mind was sharp as a fabric covered thumbtack.  Apparently, those days are behind me.
Here are the magnets on my vintage Child Guidance magnet board.
The only difference between the How About Orange tute and what I did is that instead of gluing in thumbtacks, I glued in a magnets.  I used Loctite gel multi-surface glue which, in my opinion, is good stuff.  It’s easy to control and sets up fairly quick.
I used a variety of bright colors.  Why?  Those scraps were on top.
I consider myself quite the connoisseur of adhesives.  I have a cupboard full of them and try to use the right glue for the right purpose.  I actually get excited about adhesives.  Good lord, I’m a geek.  But, I’m a geek with some cute fabric magnets.
My adhesive collection.
By the way, how cute is my vintage Child Guidance magnet board?  It lives above my ironing board in my sewing room.  Here's a close up of the adorable graphic.
Cute, cute, cute...
Tomorrow we'll post our Easter challenge submissions then come back on Thursday for a roundup of all our Scrapbusters!


Pin It

Monday, March 28, 2011

Scrapbuster No. 30: Scrappy Sleepover Pillow

This weekend was awesome! My husband took our oldest daughter camping with another dad / daughter duo, and I got to stay home with my littlest one, Isabelle! I thorougly enjoyed having an ENTIRE weekend to simply hang with Izzie. You better believe I spoiled her as rotten as I could all weekend. In turn, she spoiled me by sleeping until 9:20 am on Saturday. Hooty hoo!
we had to wear dresses (she insisted) to "fancy breakfast" at a friend's house - beautiful beautiful Arizona weather!

Anyway ... as a part of Scrapbuster Month, I knew I wanted to make a pillow, I just didn't know how exactly.  Also, my children have a teensy bit of a hoarding tendency (and have recently been caught "hiding" (other people's) things in small places to avoid detection ...yeah no bueno).

SO ... when I saw this Sleepover Pillowcase Tutorial over at A Lemon squeezy Home, I felt I found the perfect project to suit both needs (scrapbuster & pillow & hoarding).
scraps pieced together to make a band

I have 2 daughters, so I have to make 2 of everything. I decided to make Izzie's first because we spent the weekend together. She helped tremendously by wearing the measuring tape and slinging scraps here and there.

Obviously, I need to make another one. Fast.

Why is this a scrapbuster? Check this picture ...


Do you see it?

This pillow is made from the leftovers from making her padded paper mache letters for her name (this was my submission to our first Challenge here on the blog; and there is a detailed tutorial on how to do this). I bought a 1/4 yard of each fabric to make her name and was able to piece the leftover fabric together to make this Sleepover Pillowcase.  I have been saving these scraps just waiting for something "special" to make.

After I made her name, I found the pink / green / yellow / white one on the 50% off table (so I bought some of that way back when); and that's how I had enough to make the pillowcase.
that's a zipper on the front there ... perfect for hiding all the special things that must go on a sleepver!
I really like how this turned out and it adds such a happy pop to her crib / toddler bed. I hope she likes using it for her next sleepover; I also hope that "night night," piggy & pillow pet all fit in there because they all go wherever she goes!
the direction of the main fabric (pink / white / green /yellow) is not consistent - not intentional, but like that it turned out that way

these three vertical stripes were the biggest scrap pieces I had; this is the "back"

Next sleepover? Coming up soon because Sarah and I are headed to Creative Estates and I'm pretty sure the girlies are staying at a friends! I cannot wait to meet other local crafters; the whole weekend sounds like it'll be great! ;-)

sara sig Pin It

Sunday, March 27, 2011

Scrapbuster No. 29: Scrap Quilts!

I went to quilt camp recently and all of us ended up making one of these quilts.  It looks complex, but it's super simple.

This is what it looked like when I started:


A giant pile of scraps.  These were cut into 5 inch squares and sewn together, then a border was added.  Then it was time to cut them up again.
You use a template available from Lil' Twister template by CS designs (www.country-schoolhouse.com).  You align the lines on the template with the seams on your quilt top and cut around the template.  You then sew the pieces back together in the same order you cut them.  You can find a complete tutorial for a version of this quilt that has sashing on Moda Bake Shop.

Like I said, several of us made this quilt.  Here are a couple other examples of the finished product:
Mary Beth made this one out of batiks.  It has a dramatic flair.
Louise and Terry both worked on this one...  what a great baby quilt!
I am a huge fan of scrap quilts.  My basic philosophy is why use some of the fabrics when you can use all of the fabrics?  


Pin It

Saturday, March 26, 2011

Scrapbuster No. 28: Recapping Applique Projects

For today's scrapbuster, I decided to share photos of some past applique projects. Adding applique to clothes is an EXCELLENT way to use up scraps. It takes so little to spruce up a plain white onesie or tees... these personalized items are always a hit at baby showers!


I love using two fabrics ...

I use sewable fusible interfacing for all of these because I either Hand or Machine sew the edges to secure it and for decoration. The no sew type will wreck your fingers if you try to push a sewing needle through .. or gum up your sewing machine. :-) Earlier in Scarpbuster Month, I posted about how to applique with no sew interfacing and provided a little tutorial (you can find the no sew bunting tutorial here) ... doing these projects is just the same with two exceptions:

1. use Sewable interfacing
2. embroidery or machine stitch around the edges!

The possibitilies are endless!


Again, use those scraps to make matching gift cards!

These lil & big sets are always a hit!
Pin It

Friday, March 25, 2011

Scrapbuster No. 27: DIY Mousepad with Tutorial

DIY Mousepad

As of Wednesday, I needed two more scrapbusters to finish out the month, but I had zip. nada. nothing.  My brain felt sluggish and I really didn’t know if it would be capable of producing any good ideas.  On top of that, I was at my desk at work and my mouse was acting up.  It was driving me nuts!  You see, I don’t have a mousepad...  or rather, I DIDN’T have a  mousepad!  I went home and made my own and it’s a perfect scrapbuster.

I used craft foam as the base.  You can buy a sheet of it at the craft store for $1.50.  I kicked around the idea of using neoprene, but decided it was too expensive.  The foam worked out just fine so I’m glad I went with it.

I am curious as to how well this will hold up over time, but the finished product seems to be as good as just about anything you can buy.  It was so cheap and easy that even if it lasts a couple of months, it will have been worth the time to make it.
My desk with my new mousepad.
Pin It

Thursday, March 24, 2011

Scrapbuster No. 26: Who says BOWTIES are for boys?

love a girl's profile! (don't say a word about that bottle - i know, and i've decided not to care! ;-)

As I was perusing through my Google Reader the other day, I noticed that LuvintheMommyhood recently posted another fun Comfy Knits vs. Sew roundup on her blog. Since I love to both knit and sew, I  hoped over to check it out. It was there that I saw an adorable picture & link to the cutest bowtie ever - and it was KNITTED! It is called "easiest bowtie ever" and you can find the pattern on Ravelry (which is free to sign up if you haven't already; it's a website full of good stuff for knitters & crocheters).

I was planning to make a bowtie from a upcycled skirt for scrapbuster month, but when I saw the knitted one - I just knew I had to make it.  I used leftover hot pink yarn from my knitted old school christmas tree lights garland - my submission for our Christmas Decor Challenge, and some size 4 knitting needles.


that hair pin is just slipped through the loop (not permanently attached)

I've had a sick child this week, so the well child and I were camping out in my room across the house trying to be quiet. We do this by turning on Handy Manny in case you're wondering. Since I can only handle about 5 minutes of Manny, Kelly, Pat, Turner, Flicker and crew ... I seized an opportunity to KNIT! I grabbed my stuff real quick and got to working! (Of course, as soon as Miss Priss saw me knitting, she insisted I get 'her lellow' yarn so she could 'yarn' with me - ha ha!).

About three episodes of Handy Manny later, wa-lah! Hot pink knitted bowtie ... love!


As pictured here ... I'm going to use this as a hairbow! Of course, I could attach as a traditional bowtie, but my model is CRAZY ticklish and won't let me ANYWHERE near her neck to try it on!

Speaking of model difficulty ... I have another bowtie (the one made from an upcycled skirt) completely finished and ready to photograph, but no participatory models. :( I tied it on a baby doll just for fun, but it is so creepy looking on her that I refuse to post. I'll just have to use some good old bribery on my models and see if I can get a picture!

she must wear the piggy shirt every.day.


sara sig Pin It

Wednesday, March 23, 2011

Scrapbuster No. 25: Patchwork Shoe Bags (with Tutorial!)

Patchwork fabric shoe bags with super suitcase decontaminating powers.
I have this weird thing about packing. If my shoes are in bags and segregated from the clothing, everything is fine. If my shoes aren’t in bags and, therefore, can come into contact with the clothing then everything in my suitcase is contaminated and needs to be washed.

Ya, I know, I have issues and medication might help.

But, I’ve discovered, I’m not the only one with issues! One time I made my friend Joe (see Joe's Stuff) several shoe bags for his birthday. To this day, they are one of his favorite things. I’ve given them to others, too, and they are always popular. I told Sara about them the other day and she immediately wanted some. As a gift, they are fantastic as they are non-gender-specific. Everyone wears shoes!
One shoe per bag so you can stash them wherever you have space in your bag. Note the Scrappy Shoelaces made by Sara.  Don't they look great on my vintage Doc Martens?
I usually like to use flannel for my shoe bags (alas, I had no flannel scraps this time). The flannel is soft on the shoes and is great if you need to give your shoes a quick buffing to shine them up. Piecing scraps together is a truly thrifty way of making your bags, but you can go buy yardage if you want.

These are nothing more than drawstring bags. I put one shoe per bag so I can stash each shoe wherever I have a little space in my suitcase (and space is always at a premium in my bag!). And it doesn't matter if the shoes are wedged in between clothes because the super-decontaminating properties of the bag will keep them safe.

Pin It

Tuesday, March 22, 2011

Scrapbuster No. 24: Orzo Filled Chick "Beanbags"

I generally do not buy magazines or have a running subscription to any ... but last year when my niece asked me to buy something from her school fundraiser, I opted to forego yet another roll or wrapping paper and ribbon for an annual subscription to Martha Stewart! I've enjoyed getting the magazine so far (I love any "real" mail in these electronic days) but the April 2011 issue is my favorite so far! There are recipes in there that I would actually make; and, there is a spread on some spring spritzer drinks that look delicious. Anyway, back to scrapbusting...


I like how you can stand 'em up!

As I was flipping through, my eyes landed on these adorable chick bean bags. They are your basic bean bags adorned with felt scraps. An ideal scrapbuster in my opinion.


my bag of felt scraps ... teeny tiny pieces, yes. most are leftovers from the boy toy challenge (go fish!)
I generally followed the instructions provided; I used the template for the chick and its "features" from the Martha Stewart website. I made a few modifications ... first, the MS instructions call for using a screw punch (??) to make the eyes; whereas the beak & wings are cut from felt. I do not have a screw punch, but I do have black felt scraps ... so I used my regular single hole puncher (for paper) to cut out two black eyes. Second, the pattern calls for LINING the chick beanbag... I didn't see a need as my scrap fabric of choice is thick enough to conceal the contents! Finally, I used Fabri-Tac fabric glue and that is worth nothing because it's phenomenal stuff! (I used it to make my submission for our first challenge - fabric padded paper maiche letters that you can see here). I'm curious to see if Fabri-Tac can hold up to toddler yanking or not!


I thought the order you sew these was cool ... you save on cutting time by ... instead of cutting out the exact chick shape, you cut around it, top stitch front and back together and then use pinking shears to make the "finished" outside. Clever! I would have first thought to sew wrong sides together and flip, but this was fast and the pinked edges are cute.


This is what I mean about not cutting the exact chick shape until you're finished sewing.

Oh, and I called this post "orzo filled chick 'beanbags'" because I used orzo to fill them in lieu of the recommended "yellow split peas." I had orzo on hand, it is cheaper, and it's so light in color it will not show through the fabric (since I did not line it). I wish I had thought to use dried pasta when I was on a prior beanbag kick - like when I made these!

Finished these chicks are about 3.5" wide by 5" tall - much bigger than I thought they would be. They are really cute and I cannot wait to put them in the girls' Easter baskets. Of course, until then I will have to hide them so their little hands do not snag them - like what happened here!


sara sig
Pin It

LinkWithin

Related Posts Plugin for WordPress, Blogger...